A Complete Guide to PCB Test

Table of Content
- 1. Bare Board Test: The First Line of Defense
- 2. Flying Probe PCB Test vs. In-Circuit Testing (ICT)
- 3. Functional Testing and PCB Multimeter Use
- 4. PCB Electrical Test: Checking Continuity and Shorts
- 5. Advanced Methods: Automated X-Ray Inspection and More
- 6. Tools and Resources Every Engineer Needs
- 7. Emerging Trends in Circuit Board Testing
- 8. PCB Test FAQs
- 9. Summary
You can spend months perfecting your circuit board design, pick the best components money can buy, and still end up with a dead board if you don’t have a solid pcb test plan in place.
It happens more often than people admit. A trace looks clean but isn’t. A solder joint seems solid until it breaks under load. Or maybe there’s a hairline short that wasn’t even visible. That’s why pcb board testing isn’t just a box to tick, it’s the one thing that stands between a working product and a pile of expensive e-waste.
PCB test methods help you catch problems early. Whether it’s a simple pcb multimeter check or an advanced automated x ray inspection pcb setup, every pcb board testing method plays a role in making sure that what you’re building doesn’t fail the second it’s powered up.
And here’s the kicker, many of the most damaging faults are invisible until it’s too late. Shorts hidden under BGA packages. Vias that didn’t form right. Or entire sections of the board that just aren’t connected due to a fabrication issue.
This guide walks you through all the essential pcb board testing methods, from the foundational bare board test, through the flexibility of flying probe pcb test, to high-throughput pcb ict test setups and final validation with pcb functional testing. We’ll also cover the unsung heroes: tools like pcb test pins, circuit board tester jigs, and even full-on x ray solder joint inspection workflows.
1. Bare Board Test: The First Line of Defense

Before a single chip gets soldered on, there’s one question that needs to be answered: did the manufacturer actually make your board correctly?
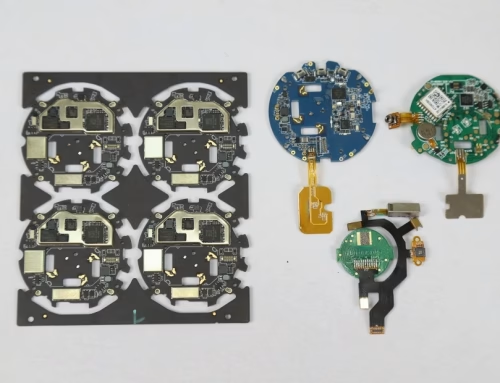
The bare board test is how you find out. At this stage, the board is just a stack of copper and substrate, no components, no heat, just raw potential. But even here, a mistake can ruin everything.
A misaligned via. A trace that didn’t etch right. A microscopic short. These aren’t rare, they’re common. And if you don’t catch them now, you’re wasting time and money by assembling a board that was flawed from the start.
Here’s how it works: manufacturers mount the PCB onto a circuit test board jig. Then, a set of spring-loaded pcb test pins makes contact with hundreds of test points. These pins check for continuity, shorts, and open lines, basically confirming that what’s on the board matches the netlist from your design files.
If the board fails this pcb electrical test, it gets scrapped immediately. No debate. Because once components go on, the cost of fixing a bad board goes way up.
Bottom line? The bare board test doesn’t just save you from disaster, it stops disaster from ever starting. PCB board testing is always essential.
2. Flying Probe PCB Test vs. In-Circuit Testing (ICT)
Once all your components are on the board, it’s game time. This is where you really need to know: does your board work as intended, or is something off?
That’s the job of pcb board testing at the post-assembly stage. And here, two main pcb test options take the spotlight: flying probe pcb test and pcb ict test.
2.1 Flying Probe PCB Test: Flexible but Slower

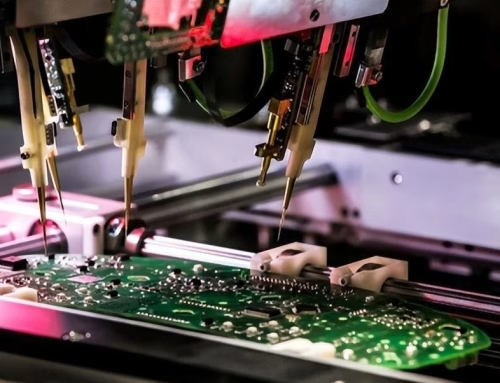
The flying probe pcb test is your best friend when you’re prototyping or working in low volumes considering PCB board testing. Think of it as a robotic test system with ultra-precise needles that literally fly from point to point. No need for a custom fixture, just load your board and let the machine work through the nets one by one.
It checks voltages, verifies current paths, and spots issues like opens, shorts, or misoriented parts. You can even use it to verify diode direction and capacitor value, depending on your setup.
The trade-off? It’s not exactly fast. Each board takes longer to inspect since the probes move individually. So once you scale up to volume production, that’s where pcb ict test starts to shine.
2.2 In-Circuit Testing (ICT): Built for Speed

The pcb ict test, or in circuit testing pcb, uses a “bed of nails” fixture to hit every test point on the board at once. Think hundreds of pcb test pins pressing down in perfect sync. This setup allows you to run a full pcb functional testing sequence in seconds, perfect when you’ve got hundreds or thousands of boards to check.
Yes, the fixture takes time and money to build, but once it’s ready, it pays for itself in sheer efficiency. That’s why you’ll find pcb ict test in nearly every high-volume electronics line today.
Whether you’re using flying probe for flexibility or ict for speed, both are non-negotiable if you care about catching post-assembly issues.
3. Functional Testing and PCB Multimeter Use
So the board looks right and passed all electrical checks, great. But does it work the way it’s supposed to? That’s what pcb functional testing is all about. It simulates real-world conditions to make sure the board behaves exactly like the final product needs to.
You power it up, apply loads, run firmware, toggle I/Os, whatever it takes. If something fails here, it’s a red flag that even perfect solder joints and clean traces couldn’t save a deeper design or assembly flaw.
Sometimes this gets automated. Other times, it’s done manually by technicians who know what to look for. Either way, pcb functional testing is the final gate before shipping.
And yes, there’s still a place for old-school tools like the pcb multimeter. Engineers use them to confirm voltages, trace power rails, and isolate tricky faults during repair. It’s not flashy, but a good pcb multimeter is still essential in debugging.
Used together, these tools give you a complete picture. Structural integrity, electrical correctness, and real-world performance, all covered.

4. PCB Electrical Test: Checking Continuity and Shorts
Let’s be clear, if your board doesn’t pass an electrical test, nothing else matters. You could have the best solder joints in the world and still end up with a useless board if something’s shorted or disconnected.
The pcb electrical test is all about verifying two things: continuity and isolation. That means confirming every connection that’s supposed to be there actually works, and every net that’s supposed to be separate stays separate.
How does it work? Typically, a pcb test board fixture or printed circuit board tester while PCB board testing hits key pads and vias with voltage pulses. It compares actual results to the netlist in your CAD files. If the current path doesn’t behave the way it should, the system flags it.
These issues often stem from hairline shorts, broken internal traces, or missing via connections. And without this layer of pcb test, you could assemble a full run of bad boards and never know until they fail in the field.
Even with smaller batches, don’t skip this. Especially not when tools like circuit test board setups and automated testers make it relatively painless.
5. Advanced Methods: Automated X-Ray Inspection and More

Even when a board passes all standard pcb test methods, you still can’t guarantee perfection, especially when you’re dealing with tight pitch components or BGAs. That’s where automated x ray inspection pcb systems come in.
These systems peer beneath the surface, literally. They scan for voids in solder joints, hidden bridges, and alignment issues you’d never spot with a microscope. For high-reliability applications, think aerospace, medical, automotive, this layer of pcb board testing is not optional.
One of the biggest advantages here is consistency. While a human might miss a hairline solder issue after checking the 500th board, the X-ray system doesn’t get tired. It applies the same logic, same resolution, every single time.
If you’re dealing with boards that require x ray solder joint inspection, investing in this level of pcb test gear can save you hundreds of hours and thousands in rework costs.
6. Tools and Resources Every Engineer Needs
Your pcb board testing workflow is only as good as the tools behind it. Let’s break down what every serious setup should have:
| Tool/Resource | Purpose |
| PCB Multimeter | Manual voltage, continuity, and resistance checks |
| Circuit Board Tester Jig | Test fixture to streamline probe-based tests |
| PCB Test Pins | Spring-loaded contact points for ICT and functional setups |
| Flying Probe Tester | Flexible, fixture-less inspection for prototypes |
| ICT Machine (Bed-of-Nails) | High-speed production testing with massive pin arrays |
| X-Ray Inspection System | Imaging under packages, checking solder joints |
| Circuit Test Board Setup | Matching board-to-jig mapping system for testing stations |
These aren’t just bonus tools, they’re the backbone of efficient pcb test strategies. Having the right gear makes the difference between troubleshooting for hours or getting clear answers in minutes while PCB board testing.
7. Emerging Trends in Circuit Board Testing

PCB test or PCB board testing isn’t static. As boards get more compact, more powerful, and more complex, the tools and techniques for testing are evolving just as fast.
Here’s what’s shaping the future of pcb board testing:
- AI-Driven Defect Detection: Newer inspection systems are using machine learning to recognize defect patterns from previous builds. These systems get smarter over time and flag issues even before human operators can react.
- Non-Contact Electrical Testing: Optical and capacitive-based testing methods are being developed to measure electrical performance without making physical contact.
- More Granular X-Ray Systems: Automatic x ray inspection pcb tools are now capable of resolving sub-10-micron defects, critical as chip packaging becomes more layered and complex.
- Design-for-Test Automation: CAD software now includes real-time feedback on test point placement and fixture-friendly design features. This reduces the back-and-forth between layout and test engineering.
- Embedded Diagnostics: Boards are being built with internal self-check systems. Think test firmware, self-logging circuits, and smart microcontroller diagnostics.
For engineers, staying ahead of these trends means choosing partners that evolve with you.
8. PCB Test FAQs
A pcb test checks whether a circuit board works as intended, electrically and functionally. It catches shorts, opens, reversed parts, and even microscopic flaws before the board is used in a real-world product. Without proper pcb board testing, there’s no way to guarantee quality or safety.
The flying probe pcb test uses movable probes and doesn’t need a custom fixture, great for small runs and prototyping. In circuit testing pcb, on the other hand, uses a bed-of-nails fixture for fast, high-volume checks. It’s faster but less flexible.
Yes, absolutely. The bare board test helps spot electrical issues like shorts and opens before you add any components. Skipping this test can mean building on a faulty foundation, wasting both time and money.
A pcb multimeter lets you manually measure voltage, resistance, and continuity. It’s not fancy, but it’s reliable, especially for quick checks, debugging, or verifying component placement in a pcb board testing process.
A circuit board tester is a general term for any device or fixture used to run a pcb test. It could be a manual jig, an automated bed-of-nails setup, or a full flying probe test station depending on the complexity and volume of your project.
Circuit board test points make testing easier and more accurate. They give machines (and humans) a reliable spot to connect probes and check signals, without damaging the board or relying on component legs.
Not entirely, but they’re a huge help. Automated x ray inspection pcb machines can catch problems under components (like BGAs) that no human could see. They’re especially useful for dense or high-risk layouts.
9. Summary
Testing isn’t the end of the process, it’s the gatekeeper.
A solid pcb test strategy isn’t optional. It’s what catches the hidden faults, the invisible shorts, the bad vias, the reversed caps. From the bare board test to final validation with a pcb functional testing jig, every check helps you avoid disasters later.
And no matter the method, be it flying probe pcb test, pcb ict test, or even automated x ray inspection pcb, each layer of testing builds trust in your final product.
Partnering with experts like ORINEW TECHNOLOGY CO.,LIMITED ensures every step of your pcb board testing process is handled with care, accuracy, and real engineering insight.
Because in electronics, it’s not just about whether your board works. It’s about knowing it won’t fail when it matters most.